

Everything below is for the web app on a computer.
Table of contents
- Step 1 — Open your avatar menu
- Step 2 — Edit your profile
- Step 3 — The other settings
- Step 4 — Turn on two-factor authentication
- Step 5 — Get help
- Good to know
Step 1 — Open your avatar menu
Click your avatar (your initials) at the top right of the screen.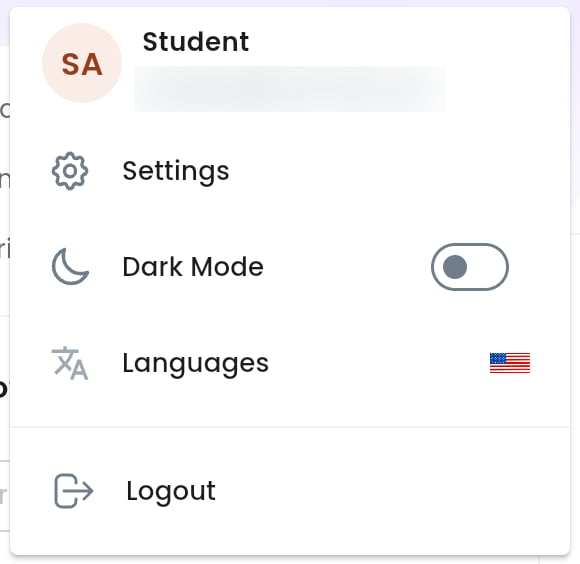
The avatar menu.
Step 2 — Edit your profile
Click Settings. The Profile section opens first.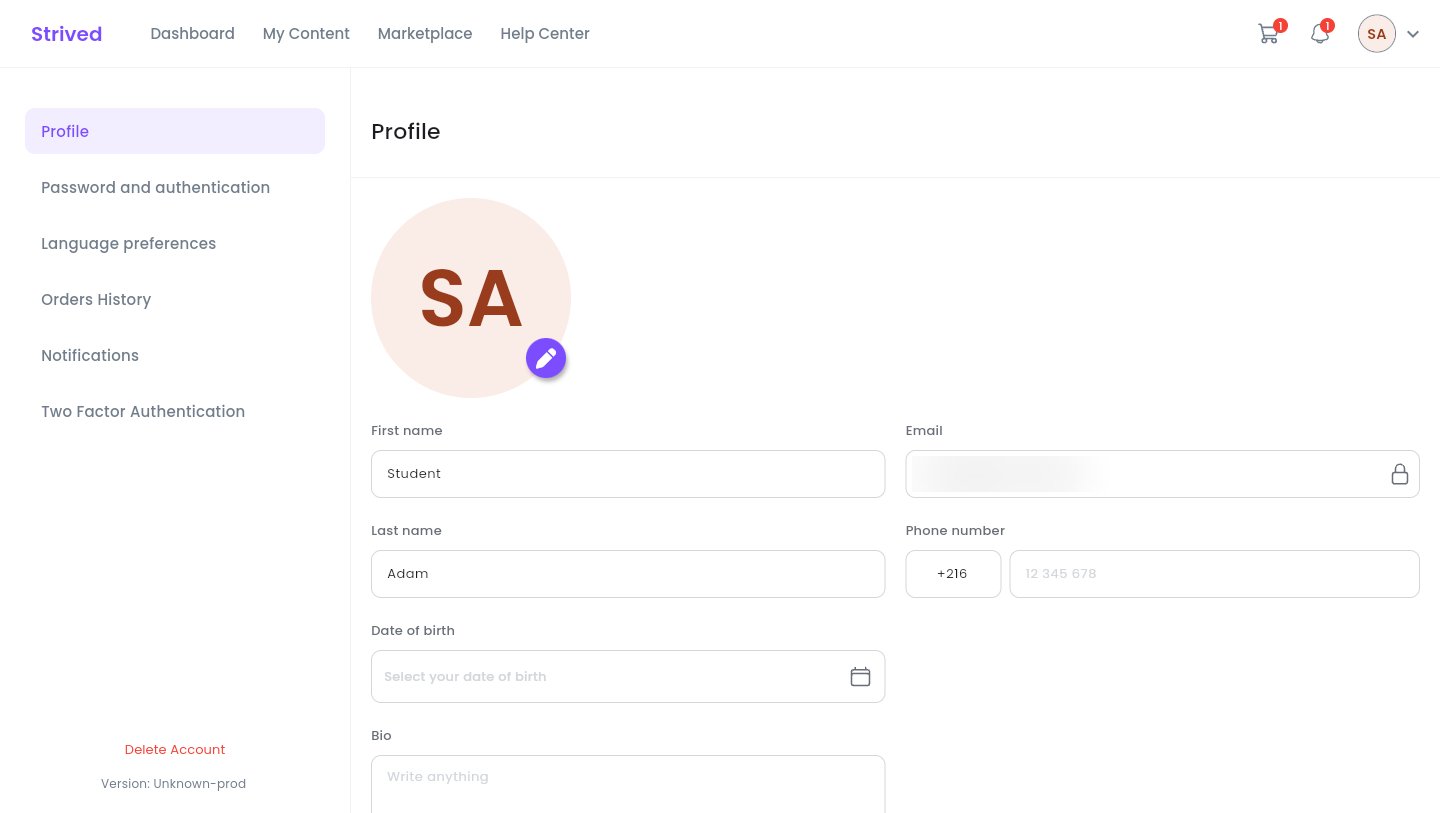
Settings → Profile.
1
Change your photo (optional)
Click the purple pencil at the bottom of your photo.
2
Fill in your details
First name, Last name, Phone number (pick the country code, then type the number),
Date of birth and Bio. The Email (padlock) cannot be changed.
3
Save
Click Update profile at the bottom of the page.
Step 3 — The other settings
The left-hand menu of Settings leads to the other sections:Step 4 — Turn on two-factor authentication
Open Settings → Two Factor Authentication, then follow the steps on screen:1
Install Google Authenticator on your phone
The app is available on the App Store and Google Play.
2
Open the app
Tap +, then Scan QR Code.
3
Scan the QR code and save your recovery code
Click Tap To Reveal QR Code, then scan it with your phone. Keep the recovery code shown
with it (Download Recovery Codes): without it, your account cannot be recovered if you lose
access to your authenticator app.
4
Enter the 6-digit code
Type the code Google Authenticator shows, then click Activate.
Step 5 — Get help
Click Help Center in the top bar.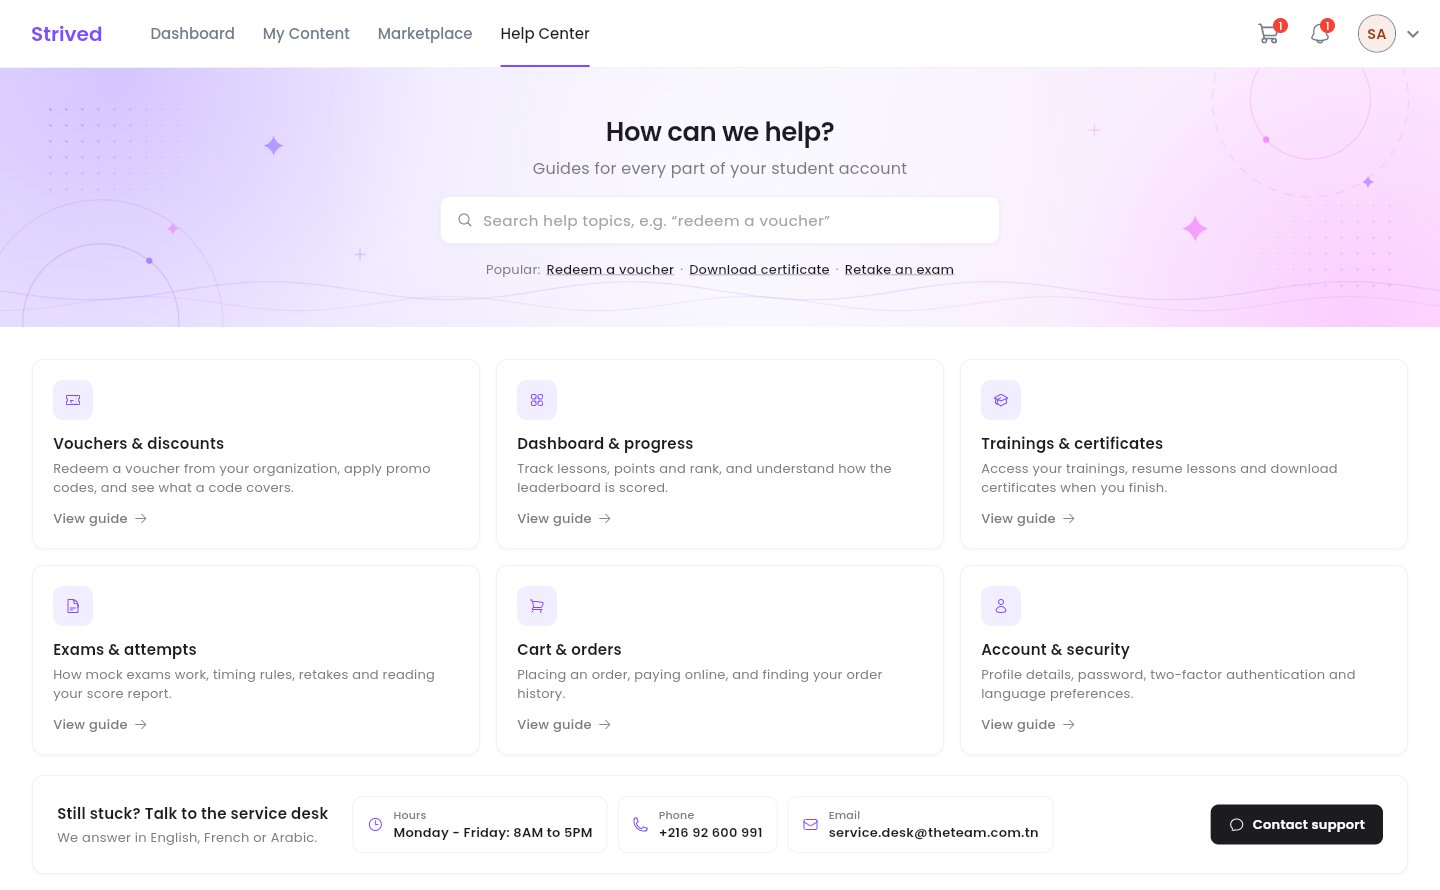
The Help Center: search, topics and the service desk's details.
- The search box and the Popular: links take you straight to frequent topics.
- Six topics group the help by theme: Vouchers & discounts, Dashboard & progress, Trainings & certificates, Exams & attempts, Cart & orders and Account & security. View guide opens the explainer videos.
- The Still stuck? Talk to the service desk banner gives the service desk’s hours, phone number and e-mail. Contact support opens an e-mail ready to send. Support answers in English, French or Arabic.
Good to know
How do I change my e-mail address?
How do I change my e-mail address?
Your e-mail is your login and cannot be changed from the app. Contact support.
Where do I see my notifications?
Where do I see my notifications?
The bell in the top bar shows the latest ones; View All opens the full list
(Settings → Notifications).