

Everything below is for the web app on a computer. Your organization adds you to classrooms:
you cannot join one yourself.
Table of contents
- Step 1 — Open Classrooms & Chat
- Step 2 — Chat in a chat room
- Step 3 — Open a classroom
- Good to know
Step 1 — Open Classrooms & Chat
Click My Content, then the Classrooms & Chat tab (address/student-my-content/classrooms). Two buttons at the top of the page switch between the views:
- Chat — your chat rooms (the view that opens first);
- Classrooms — your classrooms.
Step 2 — Chat in a chat room
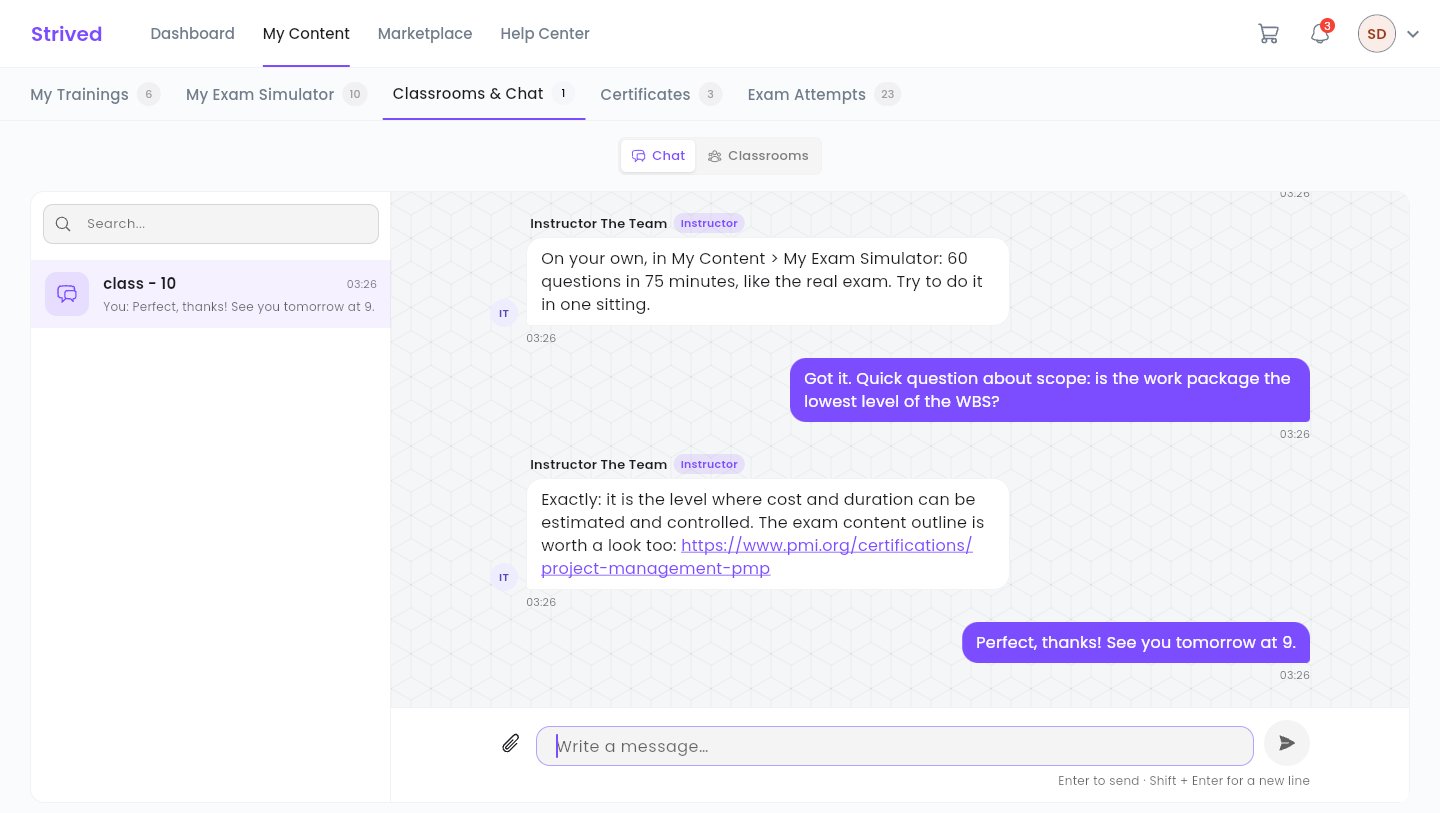
The Chat view: your chat rooms on the left, the conversation on the right.
1
Pick a chat room
The list on the left shows your chat rooms and their latest message. The Search… box
filters them by name.
2
Write your message
Type in Write a message…, then press Enter to send it. Shift + Enter starts a new
line without sending.
3
Attach an image (optional)
Click the paperclip. Accepted formats: JPG, PNG, GIF or WEBP, up to 20 MB per image, 4 images
per message.
The instructor and every learner of the classroom read the conversation: do not share anything
personal there.
Step 3 — Open a classroom
Click Classrooms. Each card shows the classroom’s name, its instructor and its number of members. The Search… box filters the cards.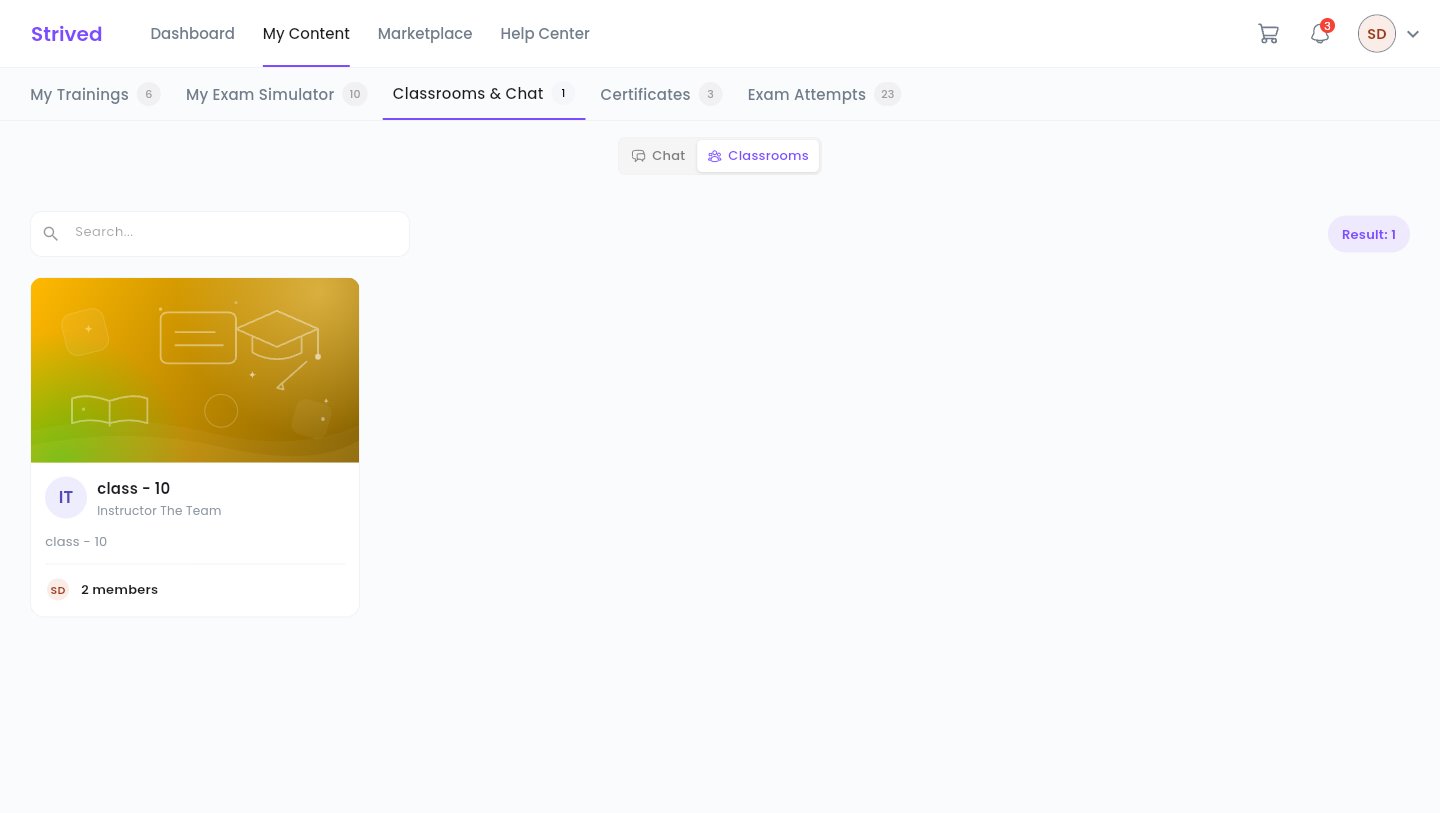
The Classrooms view: one card per classroom you belong to.
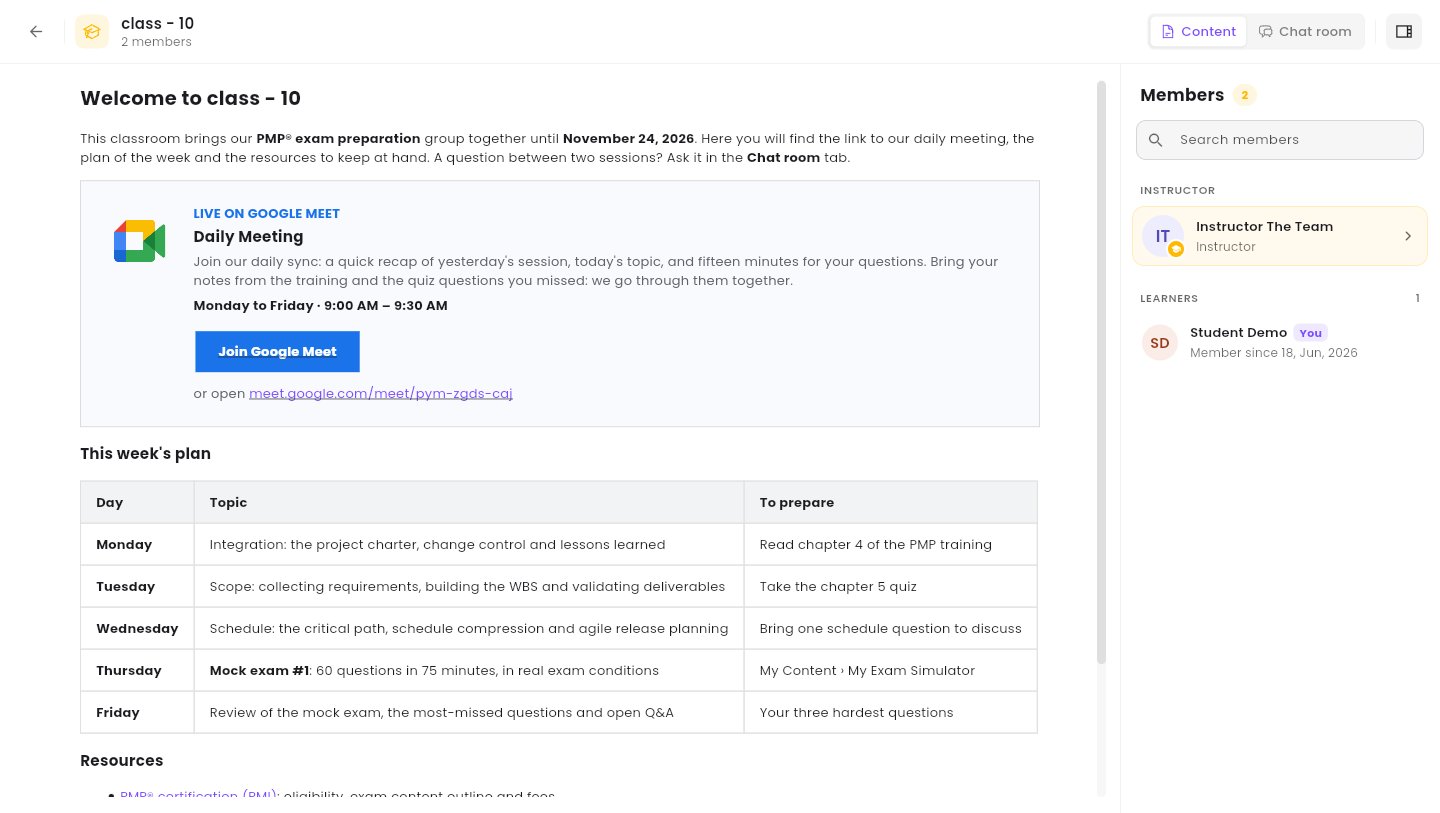
A classroom: its content on the left, its members on the right.
If you do not belong to any classroom yet, the view shows No classrooms yet.
Good to know
How do I know someone wrote to me?
How do I know someone wrote to me?
The bell in the top bar shows your notifications: a new message in a chat room, being added to
a classroom, and so on. View All opens the full list.
I cannot see my classroom
I cannot see my classroom
Your organization may not have added you yet. Contact your instructor, or support from the
Help Center.