Everything below is for the web app on a computer, signed in as an Admin.
Table of contents
- Step 1 — Find a user
- Step 2 — Create an account
- Step 3 — Update an account and change its role
- Step 4 — Look up a learner’s activity
- Step 5 — Manage an instructor
- Step 6 — Ban or archive an account
- Good to know
Step 1 — Find a user
Click Users in the sidebar.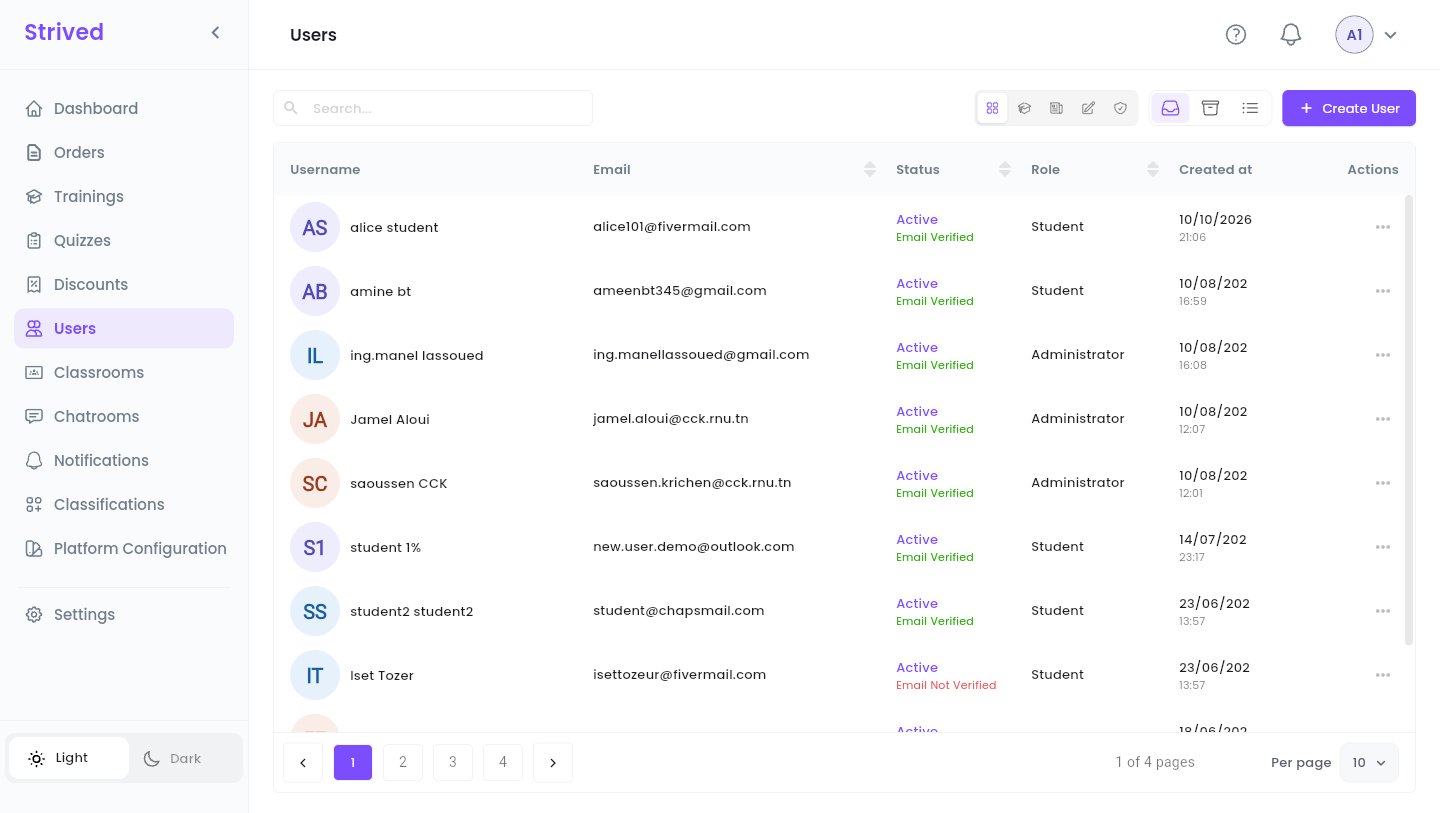
Users.
- Search… finds a user by name or e-mail.
- The five icons to the left of Active / Archived / All records filter by role: All, Students, Instructors, Content Managers and Admins.
Step 2 — Create an account
Click Create User at the top right.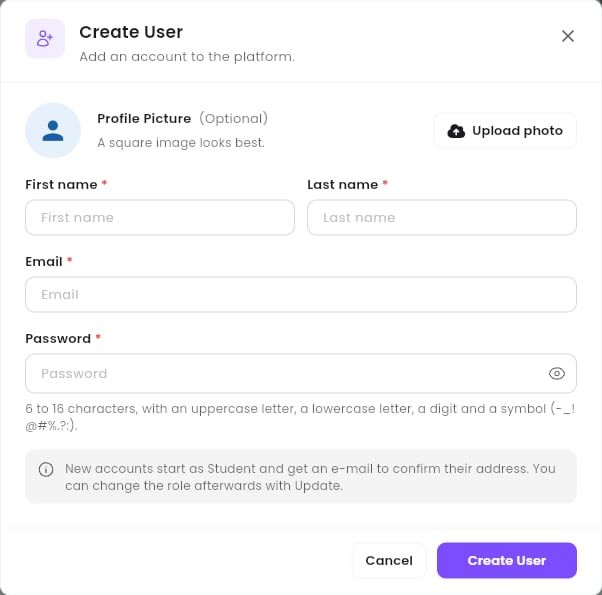
Create User.
1
Profile picture (optional)
Upload photo. A square image looks best.
2
Name and e-mail
First name, Last name and Email.
3
Password
6 to 16 characters, with an uppercase letter, a lowercase letter, a digit and a symbol
(
-_!@#%.?:). The eye shows what you typed.4
Create
Click Create User.
Step 3 — Update an account and change its role
Open ⋯ → Update on the user’s row.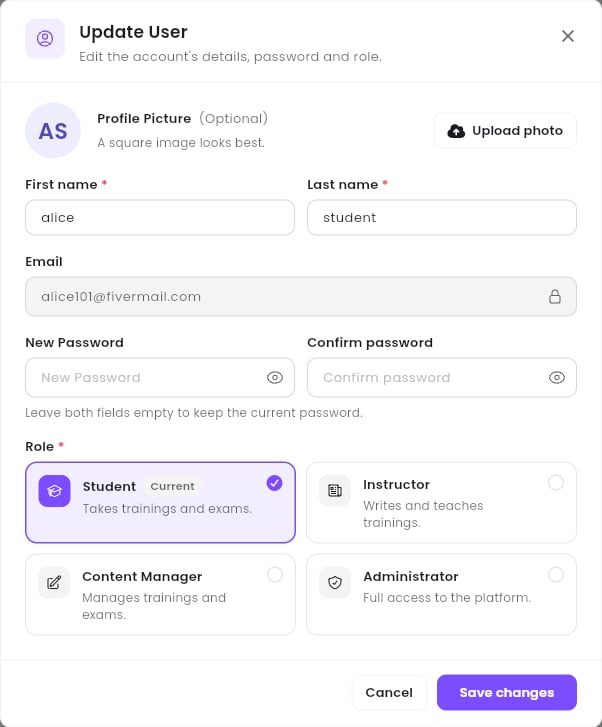
Update User.
- First name and Last name can be changed. The Email is locked.
- New Password / Confirm password set a new password. Leave both empty to keep the current one.
- Role: pick Student (takes trainings and exams), Instructor (writes and teaches trainings), Content Manager (manages trainings and exams) or Administrator (full access to the platform). Current marks the role the user has now.
Step 4 — Look up a learner’s activity
On a student’s row, open ⋯ → Learner Analytics.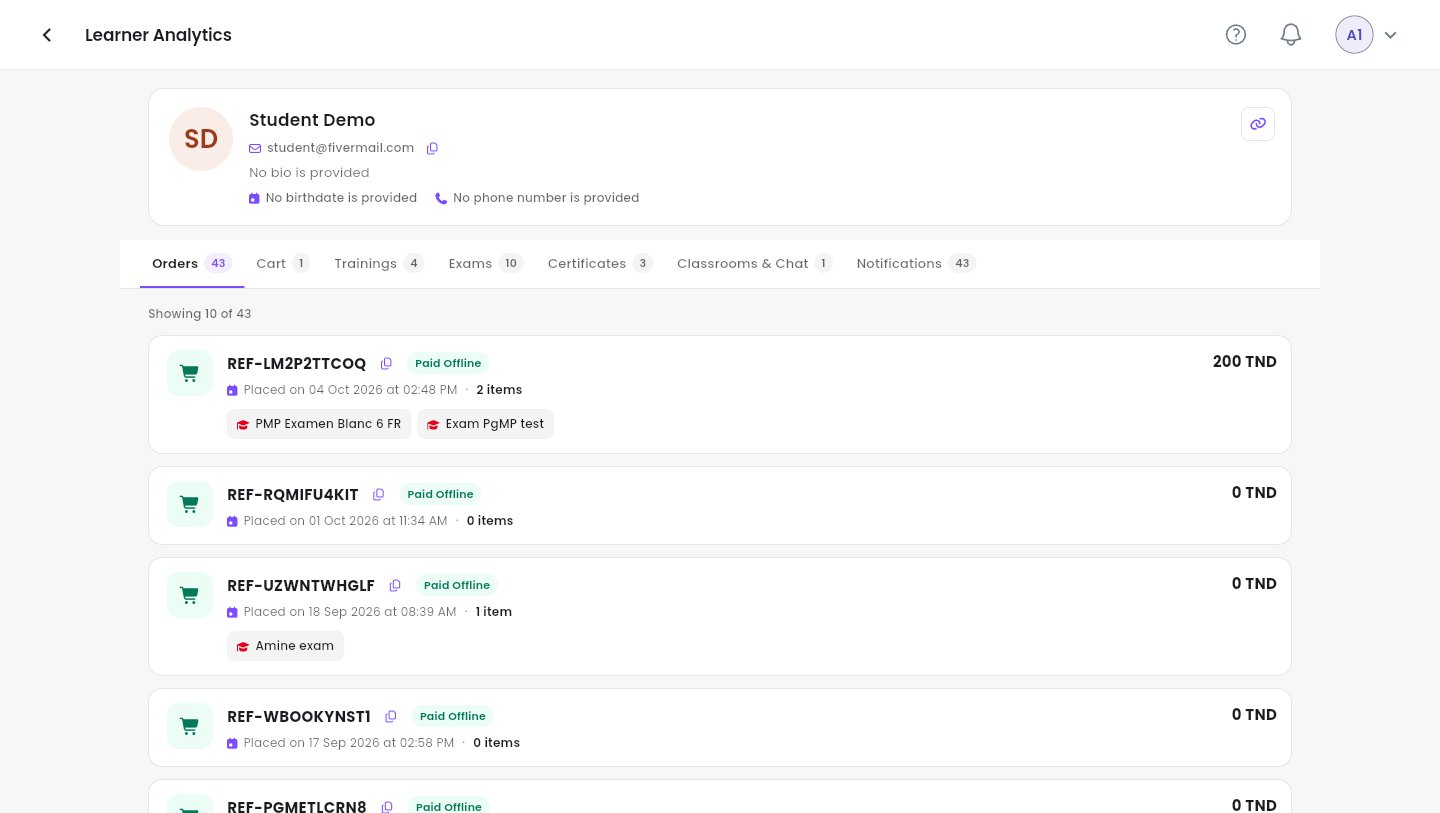
Learner Analytics.
Follow a learner’s progress in a training
Open the Trainings tab: one row per training the learner has access to. Click a row to open the training, then click a chapter to see its lessons and quizzes.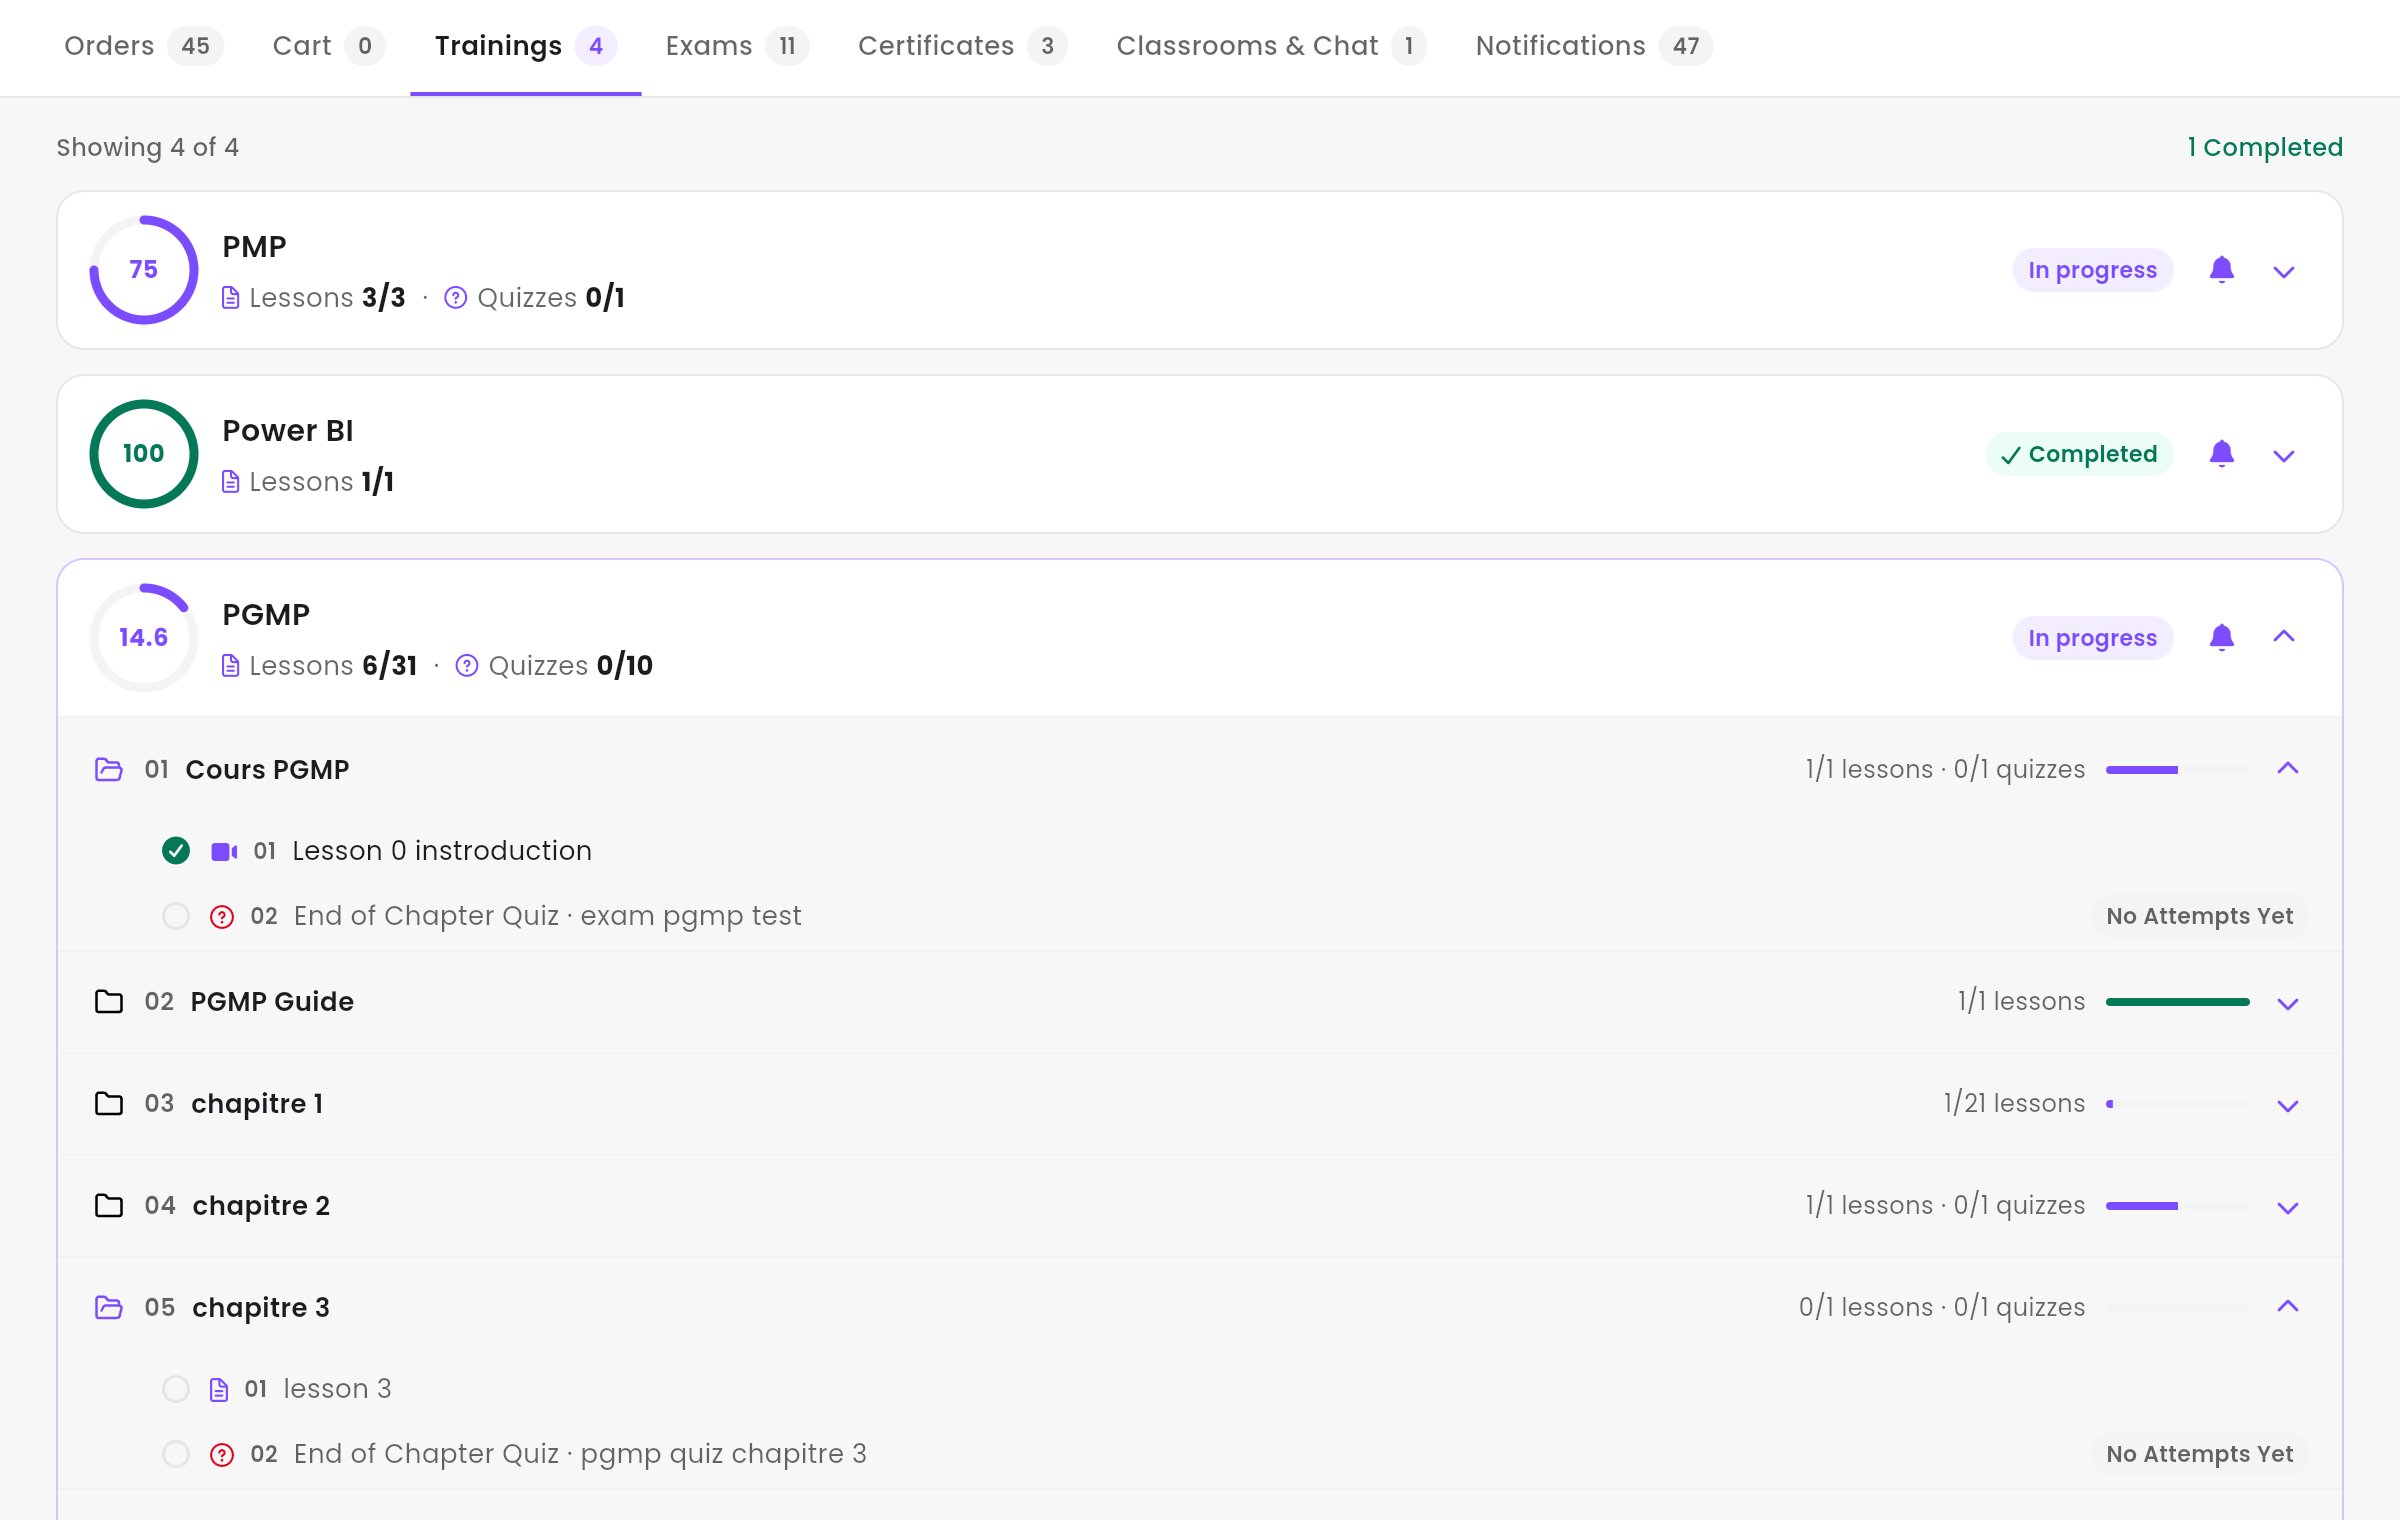
The Trainings tab, with the PGMP training and two of its chapters opened.
Inside an opened training, each chapter shows what is done (1/1 lessons · 0/1 quizzes) with a
small bar, green once the whole chapter is done. In an opened chapter:
- a green tick marks a finished lesson or a passed quiz; an empty circle marks a lesson the learner hasn’t finished or a quiz they haven’t passed yet;
- the icon before the name gives the lesson type (video, document…), and End of Chapter Quiz marks the chapter’s quizzes;
- the pill at the end of a quiz row gives the learner’s result: Passed · 85%, Best 40% (tried, not passed yet), or No Attempts Yet.
Step 5 — Manage an instructor
An instructor’s ⋯ menu has two extra items. Set Revenue opens Instructor Revenue: type the instructor’s default Revenue percentage (for example30), then Confirm. This is the share of each sale the instructor earns. Set it
before you create a training or an exam for this instructor: the editor refuses to continue while
it is missing (“Missing Revenue for Selected Instructor”).
Preview profile opens the Instructor Profile: bio, LinkedIn link, About me,
Skills and Certificates.
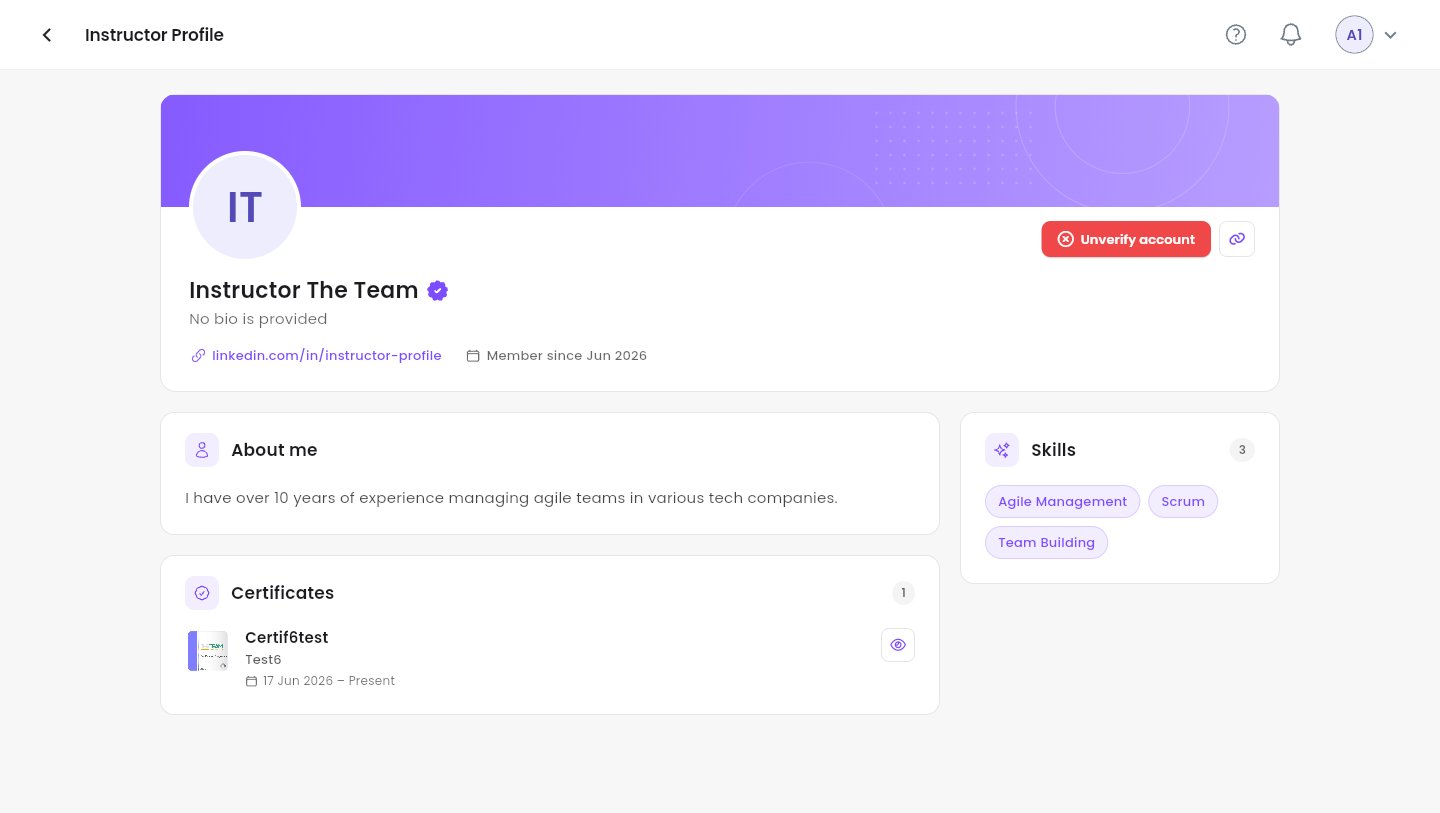
An instructor's profile.
Step 6 — Ban or archive an account
Good to know
Can I change a user's e-mail?
Can I change a user's e-mail?
No: the e-mail is the login and stays locked in Update User. Create a new account with the
right e-mail if needed.
A user forgot their password
A user forgot their password
Set a new one in ⋯ → Update (Step 3), fill in New Password and Confirm password, and
give it to them.
How do I give a learner a training without an order?
How do I give a learner a training without an order?
From Trainings: ⋯ → Assign learners — see
Manage trainings. For several trainings and exams at once, use a
voucher — see Vouchers and coupons.
A quiz shows 1 attempt(s) next to No Attempts Yet
A quiz shows 1 attempt(s) next to No Attempts Yet
The learner started the quiz but never finished it. attempt(s) counts every attempt, even
unfinished ones, while the pill only shows a score for finished attempts, hence No Attempts
Yet. The quiz stays not passed until the learner finishes an attempt with a passing score.